Thursday, February 25, 2010

Lavash Crackers: Naan What I Expected

Alright, this week there are hardly any pictures. We were at Bill's parents' this weekend, so I didn't want to make anything too complicated and messy. It turns out that even easier than this "bread" stuff I've been making are crackers. Yes, instead of these crazy two day recipes or having to get up at 5:00 AM to make breakfast, I churned out a batch of crackers in two hours flat.

These particular crackers, lavash crackers, are actually more like a flatbread originating in Armenia. It is the most commonly made bread of many Middle Eastern countries, and undergoes a short life as a tortilla-like bread before drying out and becoming brittle. The traditional way to make lavash is incredibly similar to how naan is made in India. The dough is rolled out and slapped onto the inside wall of a tandoor, a cylindrical clay oven used throughout that region of the world that reaches insanely high temperatures around 900 degrees. The bread is then fished out before falling into the coals.

This particular recipe was intended to skip the tortilla stage and head directly to cracker mode. My first batch turned out very well, but my second batch didn't roll out as thin and turned out more like the aforementioned naan. They were both wonderful, however, and I will certainly be making these in the future, probably the next time I make hummus, as they would be the perfect dipper.

The crackers are pretty standard fare: flour, salt, yeast, honey, vegetable oil and water. After I scooped out half the ingredients, we realized the house was fresh out of honey. We took an emergency trip to the Amish store down the road and picked up fresh honey and some pumpernickel flour so I can start my sourdough revolution in a few weeks. That place seriously had every kind of flour I needed. Unfortunately, we haven't found a place around here yet that sells pumpernickel flour, high-gluten flour or a few of the other specialty flours needed for a few of these recipes. I'll probably be buying in bulk the next time we go up.

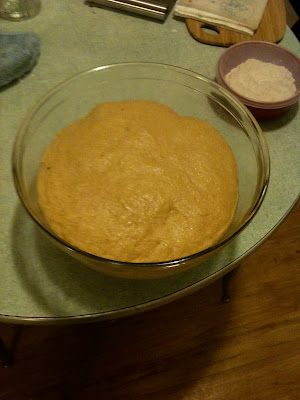
The ingredients came together without any fuss and formed a very nondescript, incredibly dense ball. This was set to rise for ninety minutes, after which it had expanded and was as much of a dream to work with as the risen dough for the cinnamon buns were the previous week. I worked to roll the dough out to be "paper-thin". Unfortunately, the only paper I could compare its thickness to would be cardboard. Oh, well! As I'm learning from Julia Child, I can call it perfect, no matter how it turned out.

At this point, I cut it into a roughly square shape and added toppings. Traditionally, only poppy seeds or sesame seeds are added, but Reinhart gave several wonderful suggestions that we tried out. On this batch, from top to bottom, were sesame seeds, caraway seeds (also fresh from the Amish store), sea salt, paprika and rosemary. Reinhart said to spray the dough with water and simply add the toppings. Unfortunately, the only things that stuck after the baking were the salt and paprika. I'm not sure where it went wrong, but everything else simply rolled off.

We had already gotten started on the crackers before I remembered to take a picture, but here they are! The odd black shapes on the right side are the poppy seeds gathered around the areas that puffed up on the second batch.

My crackers look absolutely nothing like the picture in the book, but we really enjoyed them anyway (the plate was quickly empty, at least). We grilled some cheese to put on top of the crackers, and they were a perfect combination. I really enjoyed having both the crunchy and the chewy versions, and the ones with the sea salt were especially good, providing a great bitter flavor on top of the slight sweetness of the honey in the crackers.

Lavash crackers? Check.
Next up? Cornbread.

Thursday, February 18, 2010

Cinnamon Rolls: In Medias Res

Alright, I've delayed this post for long enough. I've had a busy week playing with my new Playstation 3, and I am currently on a break to watch Project Runway. To that end, we'll just jump right into the amazing cinnamon rolls I made. No backstory, no muss, no fuss.

Imagine the most delicious cinnamon rolls you've ever had. Now imagine those with more cinnamon, more sugar, a delicious hint of lemon and a wonderful softness that just melts under your fork. These cinnamon rolls definitely take a significant time commitment, but every now and then, they will be worth making again and again and again and...

First, I would like to point out what time I got up to make these, because I love my mommy and daddy (and didn't really have money for more substantial birthday presents).

Yes, I got up, on my vacation, at 5:00 AM to make these. We ate around 9:30. It's not that much of a time commitment, but it's definitely more than Pilsbury.

The original combining was quite an experience this week, as I didn't feel like gathering the components to my mom's mixer. Step one: sugar, salt and shortening. To that, egg and lemon extract. Finally, flour, yeast and milk. I didn't get any pictures of these steps, as my phone decided to die for a few minutes.

I didn't really knead the dough like I was supposed to, but I worked it enough. I really enjoyed the dough, as it was very light and easy to get my hands into. After letting it rise for a few hours, I rolled it out into a rough rectangle. This was quite a treat, as the dough felt like a very soft stress ball. It was quite a change from the experience of trying to work the nuts and raisins into the dough last week.

The dough stayed stretched out just fine, then I spread across a metric ton of cinnamon sugar. At this point, I rolled it up and was very pleased that the cinnamon sugar mostly stayed on the inside this time.

I cut the log into eight cinnamon rolls, watching the cinnamon sugar flow out across the counter. Notice the enormous mount on the pan. At this point, the rolls were left to proof for another hour and a half.

While baking, the rolls began to emit the most amazing lemony smell. I really wanted to eat them at this point, but there was one more step: the glaze.

Since the dish I put these in only had room for seven rolls, my dad got to taste test the last roll. After getting two thumbs up, I finished putting the glaze on the remaining rolls.

I ended up making WAY more glaze than needed, so this pan was literally a lake. Nobody seemed to mind though--we were all too busy wolfing these down.

All in all, I'd give this recipe a 10/10!

Cinnamon rolls? Check.
Coming up next week (at Bill's house... lots of traveling baking!)? Lavash crackers.

Tuesday, February 9, 2010

Dr. Uglybread or: How I Learned Not to Mess With Bread That's Already Started Proofing

This week I learned a valuable lesson. Several, actually. First: beauty is only crust deep. Second: never wake a sleeping baby. Third: curiosity killed the fermentation.

Lesson one. I had intended to put a cinnamon swirl in the middle of this week's bread, cinnamon raisin walnut bread, . For reasons that will become clear, one loaf did not end up with any sort of swirl, and the other loaf's swirl was incredibly faint. That's alright, though, as this bread was full of a wonderful cinnamon burst and loaded with raisins and walnuts. One of my main pet peeves with buying cinnamon raisin bread from the store is that the cinnamon and raisins always seem like an afterthought.

Lesson two. After setting the loaves out to proof, I realized that I had forgotten to create my cinnamon swirl. Due to the fact that the loaves had already begun to rise, I had to attempt to degas them and quickly create a cinnamon swirl before letting them rise again. I ended up with too much dough to roll out effectively, leading one loaf to squish all the cinnamon sugar out, and leading me to accidentally roll that loaf all around in the resulting cinnamon sugar lake. The loaf itself looked pretty tasty, as it was covered in cinnamon and sugar, but it was not very appealing. The second loaf went better, as I rolled it in the other direction and didn't drown it in the cinnamon sugar.

Lesson three. After putting the loaves back to ferment, the 'ugly' loaf didn't rise out and the 'pretty' loaf didn't stretch out. This wasn't too bad, as the taste really wasn't affected, and it created a pretty interesting look for the stumpy loaf. Next time, I won't be so quick to try to go back a few steps when I should know that it's too late.

When the bread was originally done baking, I was pretty disappointed with the outcome, but by now I've realized the learning opportunity it has provided. Also, since the taste was not affected one bit, I've also realized not to sweat the small stuff.

Without further ado, on to the bread!


This week, after reading the first few chapters of the book, describing cooking procedures, I decided that it would be best for me to start measuring my ingredients out by weight. I surprised myself a bit at how off my volume measurements were, so it turned out to be quite an asset.

This first step was a bit more involved than the previous breads. The first step was the dry ingredients. Flour, sugar, salt, yeast and freshly ground cinnamon from Findlay Market were all whisked together. To that, I added an egg, buttermilk and some shortening.

I didn't take many pictures, because adding the raisins and walnuts was quite a feat. I ended up rolling out the dough, throwing a ton of raisins and walnuts in, then sealing it up in a giant pouch. I repeated this a few times, trying to get the ingredients evenly mixed throughout. I ended up throwing the mess back into the mixer a few times, but this mixture sure doesn't handle like cookie dough, as much as the picture may look like chocolate chip cookie dough. Eventually I figured the raisins just wouldn't end up evenly spaced, and that was okay.

After letting the dough rise, it ended up very airy and of a much different consistency than the previous breads. The dough was very soft and light, so it was fun to handle a different dough. After dividing the dough in half, the aforementioned swirl disaster occurred. I also stopped taking pictures at this point, so we'll skip on to...

If you look closely, you can see the shortness of the loaf on the left and the stumpiness of the loaf on the right. Oh, well...

The loaves still looked quite appealing, regardless of their growth issues. I coated the tops of the loaves with butter and rolled them in cinnamon sugar. You can't see it too well, but it gave the crust a delicious and sweet burst of flavor.

As I said, this bread was positively loaded with raisins. They provided an extra burst of flavor in virtually every bite. The cinnamon flavor was also pervasive, giving every bit of the bread a wonderful scent and flavor, no doubt enhanced by the freshness of the spice. I will definitely be making this again when I need to appease a sweet tooth, but next time, I'll be taking my lessons to heart and treating the dough with a little more respect.

Next weekend, I'll be at home, so it will be my first time making anything vaguely bread-like out of another kitchen. I've decided to make something with an extremely short prep time, so as not to clog up what will doubtlessly be a very busy house.

Cinnamon raisin walnut bread? Check.
Next up? Cinnamon rolls!

Tuesday, February 2, 2010

As the Bread Bakes

The curtain rises. Our surly hero, an unnamed fisherman, is returning home from a hard day's work. All he can think of is his desire for dinner. Anything would be fine, really. Anything, that is, except for more cornmeal and molasses. You see, our hero's wife, Anna, was a lousy homemaker. It's not that she didn't try, it's just that all she knew how to serve was cornmeal sweetened with molasses.

Arriving home and seeing a big pot of cornmeal on the table with some molasses, our hero flies into a rage, grabbing flour and yeast, throwing it all into the pot with the molasses, and baking the resulting mass. After throwing the future bread into the oven, he mutters under his breath, "Anna... damn her!" The lights fade. The curtain falls.

This local legend develops the framework of my second bread of this past weekend, anadama bread. Although the tale cannot be confirmed either true or false, it provides a reasonable framework for the development of a bread that I have taken quite a shine to. Naturally, an early twentieth century Martha Stewart wannabe determined that such a foul name would besmirch the reputation of the genteel folks in New England, so the name was refined and a local delicacy was born.


The bread starts simply enough, with some cornmeal and water.


These are combined in a bowl to create a 'soaker'. This is a term for something that is left to sit overnight that does not contain yeast. As a result there is little to no fermentation occurring, but, instead, the grains are softened to better facilitate the remaining baking process. I left my soaker by the knife rack in case anyone got any smart ideas.


The next step didn't contain any major surprises, either. The soaker was combined with water, flour and yeast to form a nice goopy mess.


The sponge was then left to sit for about an hour until it began to bubble. This was slightly creepy, but interesting to watch.


If you look carefully, you can see the bubbles on the surface of the sponge. Adding more flour, salt, molasses and butter provided quite interesting, as a majority of the additional volume of the sponge was comprise of air, causing the mixer to turn the bowl into a minefield of exploding flour as the air escaped.


Due to the cornmeal, the resulting mixture really felt and looked a bit like oatmeal cookie dough. Reinhart seems kinda picky, as he had me knead the dough until it hit a certain temperature, but as soon as the dough seemed done, it turned out to be at the requisite temperature.


At this point, I covered the dough and left it to rise. It turned out to be a little cold for a timely raising, so I moved it into the over with the loaves of brioche and the hot water.


Shortly thereafter, I had a giant blob of dough, just waiting to become whatever I could dream of! Since our loaf pans were currently full of brioche, I decided to be a little more creative with this dough.


I ended up making five kaiser rolls, two batards, and two split rolls. Unfortunately, I didn't put enough flour in the crack on the split rolls or did something else wrong, because the split ended up baking out. I then let the dough proof until the brioche was out of the oven and immediately baked it.


And, voila! Beautiful rolls and other bun-like objects. I really have enjoyed this bread so far. It has a nice flavor like a very flavorful wheat bread and is just heavy enough to have a substantial presence. I know I'll enjoy it when I have it as a sandwich, but I've been too busy eating away at the buns so far to put anything on them!

I'm not sure what the next bread will be yet. I'm taking the book to work and having a co-worker pick one for me. Going from the first recipe to the last seems a little bizarre, as a number of the recipes in the book are specifically celebration breads that would be a little out of place at the moment. So don't hold your breaths in suspense, as it will be a long wait until next Sunday to find out what I choose!

Anadama bread? Check.