Monday, March 29, 2010

Sourdough: Or, according to Lora, boobs.

Alright, so I'm six posts behind on this thing, so these posts will be short while I catch up. This is partially because I have too short of an attention span to write too much and partially because these breads were much more involved, so I didn't have a chance to take many pictures with which to fill these posts out.

This sourdough was quite a labor of love. I began by making my own sourdough starter. The first try never took off, as the wild yeast apparently wasn't appreciating the lovely home I was providing for it. The second try worked, however, and a week or so later, I had a barm ready to scoop up and start my first sourdough. I started out with some barm, flour and just enough water to for it to form up into a ball, then let it ferment for a while until it doubled in size. I then let it relax in the fridge overnight.

The next day, I took the starter out of the fridge and cut it into smaller pieces. I happen to believe they looked like pizza rolls. I added these starter pieces to some flour and salt with enough water to make a nice smooth dough, then did the whole kneading and fermenting thing.

At this point, I split the dough into two pieces and made boules, the word snobby people people use for the round dome of bread ("balls"). These rose again, and I used the same baking technique as I did for the ciabatta. It wasn't quite so scary this time, as I knew I wouldn't immediately destroy the bread if I did something wrong.

So they were a little lumpy and not exactly round, but not bad for a first time effort! The bottoms are another story altogether, as it was very apparent how I tried to pull the dough around to make the balls, but I suppose that's something I'll learn with practice.

The bread itself was excellent. It had a great tang to it, so I know my wild yeast friends were doing their job. I really don't have any distinct memories of eating sourdough bread before, so I don't have anything to compare it to. The original startup for this bread was quite an investment, but I now have barm that I have been using for various recipes for two weeks now, and I'm glad I have it at my disposal, as I can make something relatively impressive like this with very little effort on my part.

Sourdough? Check.
Next up? Rye.

Thursday, March 18, 2010

Ciabatta: Better than the missing glass slipper.

This week, I was really interested in making a tasty bread with something special about it. It turns out this ciabatta recipe was relatively easy and used a number of new techniques that I am actually using again right at this very moment. I was a little scared, because this involved some pretty quick action in the oven at its hottest temperature, but it was pretty fun.

There were several variations offered in the book to this recipe. I chose the onion and herb version over mushroom or cheese for no particular reason, but I'd like to try it again with each of the other versions. Also, I had a few ratio problems, so the ciabatta, which was supposed to puff and be filled with holes, was more compact like regular sandwich bread. By the way, ciabatta, Italian for 'slipper,' is named such due to the traditional shape of the bread.

And, with no further ado, on to the bread!


Phase one, the poolish. This is a simple pre-ferment made of flour, water and yeast. This sits until it begins to bubble, then takes a nap in the fridge overnight.

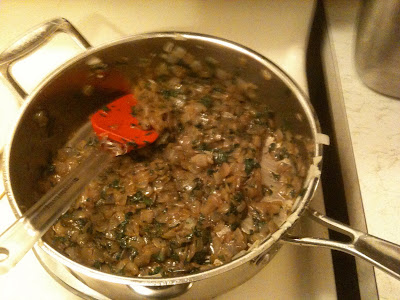
The next day, the poolish is taken out to dechill, and the onions are caramelized with a little sugar and some herbs. I used parsley and basil, and they were amazingly delicious.

At this point, a portion of the poolish was mixed with some flour, salt, yeast and milk (instead of water to create a softer bread) to make a somewhat sticky dough. Unfortunately, I used WAY too much poolish, so it was a firmer dough. At this point, I misunderstood the directions and split the dough into the two loaves, which was supposed to happen much later. The dough was then stretched out and the onion mixture was spread across it. The loaves were folded up letter-style and left to sit for 30 minutes before the process was repeated again.

They didn't swell too much at first...

But by the end of the rise, they were HUGE! Unfortunately, the shape of the bottom one was pretty awful. I tried a few times to get it more "slipper-shaped" like the top loaf. The exciting part was the baking. For this, the oven was heated up to 500, and the loaves were slid onto the pizza stone. I should have gotten a peel, but the baking sheet worked alright to slide the loaves into the oven. A cast-iron skillet was placed under the stone, into which I poured a cup of water to instantly steam. At thirty second intervals, I would open the oven and spray water onto the walls to produce more steam. This steam is supposed to cause the bread to puff out, but since I used so much more poolish than I was supposed to, the loaves were about twice as large as they should have been, and it just made a normal, more dense bread.

And, voila! The bottom loaf turned into an absolute monster, but it was amazing. The onions created a sort of swirl through the bread, due to the way it was folded into the bread, and they managed to stay cool and juicy. The bread had a little poof right under the crust, but nowhere else. It was also an incredibly simple bread, perfectly designed for a dip in some olive oil or stuffed with onions and herbs. Basically, yum!

Since I've finally gotten my sourdough starter working, I'm about to have a long run of sourdough breads. I hope you're excited!

Ciabatta? Check.
Next up? Basic sourdough bread.

Thursday, March 11, 2010

Challah At Ya Boy!

So I had originally intended to save this recipe for some sort of holiday or celebration period, but one popped up right in front of my eyes: my bestest friend's birthday! I had originally intended to force Lora to learn how to make some sort of simple bread just to share the joy I get when I make something as exciting as bread. Looking through the book, Lora decided on challah just because the name excited her so much. So, off we went to pick up some yeast and bread flour!

Challah is a traditionally Jewish bread, most notable for its use of a large number of eggs. Since we made it in celebration of Lora's birthday, we ended up making the double-braided celebration-style loaf. This style was created to remember the manna that fell from Heaven while the Israelites travelled through the desert. Since the manna did not fall from the sky on holidays or the sabbath, a double batch would fall the day before. Astounding!

The recipe itself is very simple. Flour, sugar, salt, yeast, vegetable oil and eggs, a combination of whole eggs and additional yolks. Mix it all up and knead!

The dough mixed up very easily and wasn't too tough to knead. We were intending to force Rio to do all the hard work, but she walked away the moment she got done with the light mixing. It figures!

At this point, we let it rise, degassed it (Lora's favorite step), let it rise again and braided it. This step was a crowd pleaser.

At this point, we used the remaining eggs whites to make an egg wash to paint on the loaf for its final proofing. Rio was extremely proud of her miniscule whisk.

After its proofing, we painted it one last time and put it in the oven. At this point, we turned the remaining egg whites into meringue for the strawberries we were eating.

There were a few problems with the baking process. First, the oven was about half the size of my oven at home, which I neglected to recognize at the time. With a loaf of this size, the top of the mini-braid was incredibly close to the broiler. After the first twenty minutes of baking, the top was already very well done. Since the remainder of the bread was still somewhat doughy, I had to drop the rack to the bottom of the oven. Since I didn't have any parchment paper, this ended up somewhat scorching the bottom of the loaf. Oops!

Nobody really seemed to care, though! Within a very short time, the loaf was torn apart and devoured by the various residents of the house. Unfortunately, we didn't have any poppy seeds or sesame seeds for the top of the loaf. Also, Reinhart mentions that we could have doubled the amount of sugar to create a sweeter bread. I quite enjoyed it as it was, though. It had a great, rich flavor, but was still something I could enjoy as an everyday sandwich bread, if it had been made as a regular loaf. If only the bottom hadn't turned into a slate of coal.

Challah? Check.
Next week? Ciabatta, potentially with mushrooms or onions and herbs.

Thursday, March 4, 2010

Cornbread: Mama's little baby loves cornbread, cornbread

This Saturday was quite a busy day. I had just finished making my first Julia Child recipe, Reine de Saba, a wonderful chocolate cake, the night before. That day, we went on an epik trek across town. That evening, we were making some Detroit-style chili for our friend's birthday. I knew I would need a quick, easy recipe so as not to get in the way in the kitchen. Although the chili was the kind you put on a hot dog and not the kind you eat like a stew, cornbread seemed to be a good thing at any time. Maybe that's just the southerner in me.

Now I am pretty particular about my cornbread. I hate the dry, tasteless, crumbly stuff like you'd get at Cracker Barrel. I like my cornbread sweet like the Jiffy kind. I expected this recipe to be a lot sweeter, but it was really very middle of the road. The real flavor didn't develop until the next day, when it had a chance to really cool down and rest. Ever since moving to Cincinnati, I've fallen in love with corn pudding. A local "Mexican" restaurant, Don Pablo, makes it wonderfully, and I was expecting something like that due to the amount of corn in this recipe.

I'd say the cornbread ended up somewhere between the two. It wasn't terribly sweet, but it certainly wasn't dry or tasteless. The bacon and corn gave it much more oomph that a Jiffy mix. Due to the busy kitchen and the ensuing disaster of trying to put an insanely tough beef heart through a meat grinder, I didn't manage to take many pictures.

The mixture started out with a cornbread soaker. This time, instead of water, it soaked in buttermilk. Since I didn't have any, I had to put some lemon juice in milk and let it sour as a substitute. I then proceeded to mix my dry and wet ingredients separately. The dry ingredient were flour (all-purpose, finally!), baking powder, baking soda, salt, sugar and brown sugar. The wet ingredients were eggs, honey, butter and the soaker. These were all mixed together nicely then filled to the brim with corn.

By this point, I had baked the bacon in the oven and collected the drippings. A portion of these drippings were put in the pan and heated in the oven, then rolled around in the pan as a coating. The batter was then poured in, and bacon was distributed across the top. This went into the oven for what seemed like forever. I just couldn't get the middle to bake.

Finally, everything managed to set perfectly. The outside was just crusty enough to be bread-like, with the inside tender and creamy enough to be cake-like. The bacon didn't really crisp much, but I don't like it rock hard, so it was great as well. I actually left it uncovered for the two or three days it managed to survive being devoured, and it just kept getting better.

This really wasn't a hard recipe. Besides preparing the soaker the night before, which takes all of two minutes, the bread could be completely finished in well under an hour. I'm not sure if I'll give up my Jiffy standby, as it really hits my sweet tooth, but this is an excellent compromise between the cake-like variety and the more hearty bread-like kind, and would be perfect with a nice thick stew-like chili.

My next bread will be baked in Huntsville, and I'll actually be pretty hands off on it. I'll be visiting my friend Lora, and I'm going to make her experience the joy of baking bread. We'll probably do either a simple white or wheat bread, as they're a great place to start, but we may do something more complicated, should the mood strike her.

Cornbread? Check.
Next up? Who knows...